In the past few weeks we've deviated from our more favoured form of embroidery by delivering how-to guides for Knitting, Crocheting and Tapestry kits. Now we want to put hour helping hands back in front of cross stitch kits, focusing today on the convenient and classy technique of parking your cross stitch.
Whilst it may sound as terrifying as having to park the car, parking a cross stitch is hardly a difficult thing to learn. In fact, we consider it a necessity for those wishing to take up the craftform as a regular activity. What parking essentially does is removes the 'holes' between the rows in your pattern. This keeps things neater, but also speeds up your work as you no longer need to anchor floss and thread every time you change colours. If you don't park, then you have to anchor colours every time you finish a contigious section, which leads to a messy back where there's lots of colour changing going on.
How to Park Your Cross Stitch
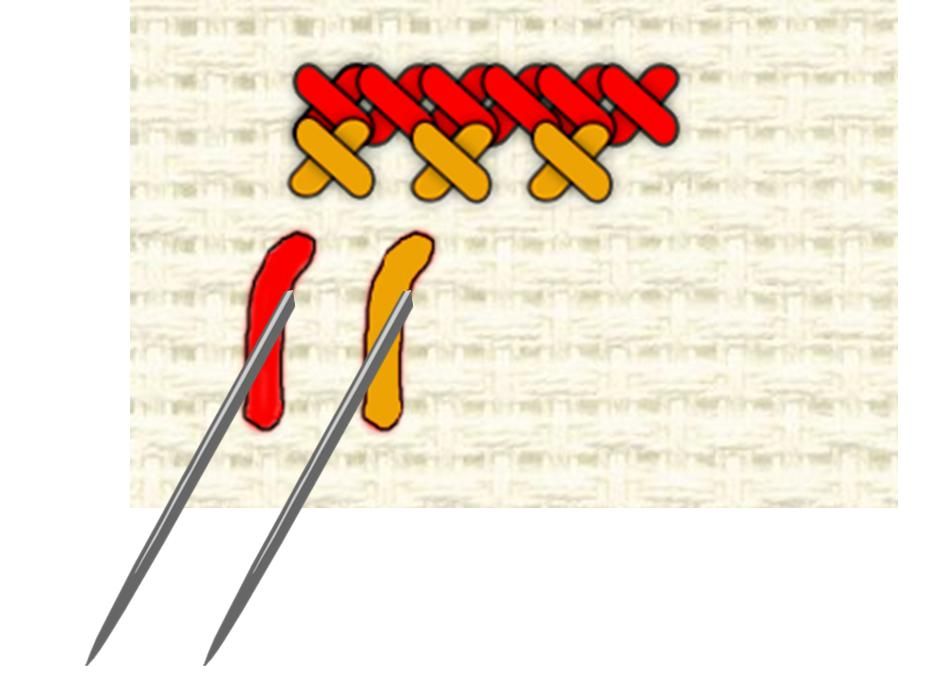
So, next you're going to stitch everything in the next row in the colour specified by your chart. For the purpose of this demonstration, let's pretend it's three orange stitches, all one space apart. Just like with the red thread, instead of going to the next orange one row down, simply park the orange floss and leave it and the needle hanging. As you may have realized, you're basically stitching row by row, rather than colour by colour.
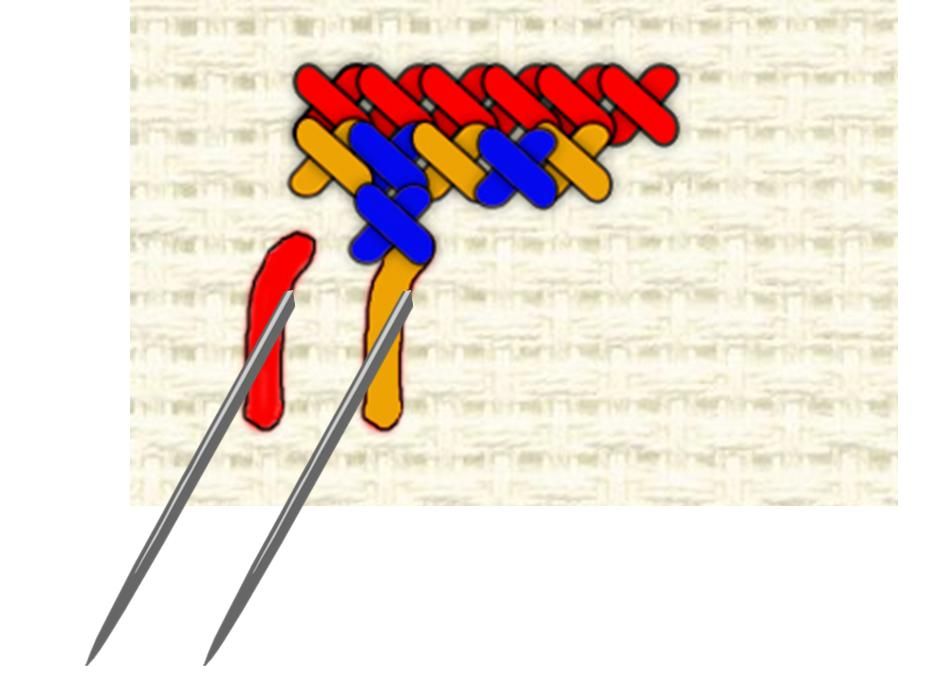
The next colour in our little pretend chart is blue, with two stitches in the second row and one in the third. Because of the parked thread, you can now complete these stitches without leaving holes. Once you've reached the end of a colour for a chart, just anchor the floss in the back of the fabric and snip off the remaining thread.
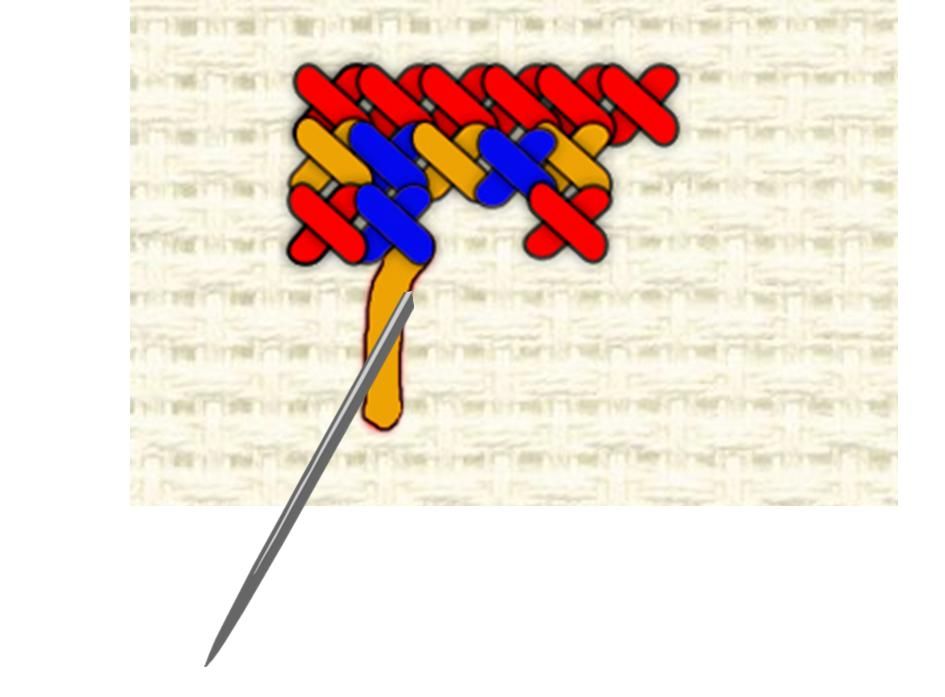
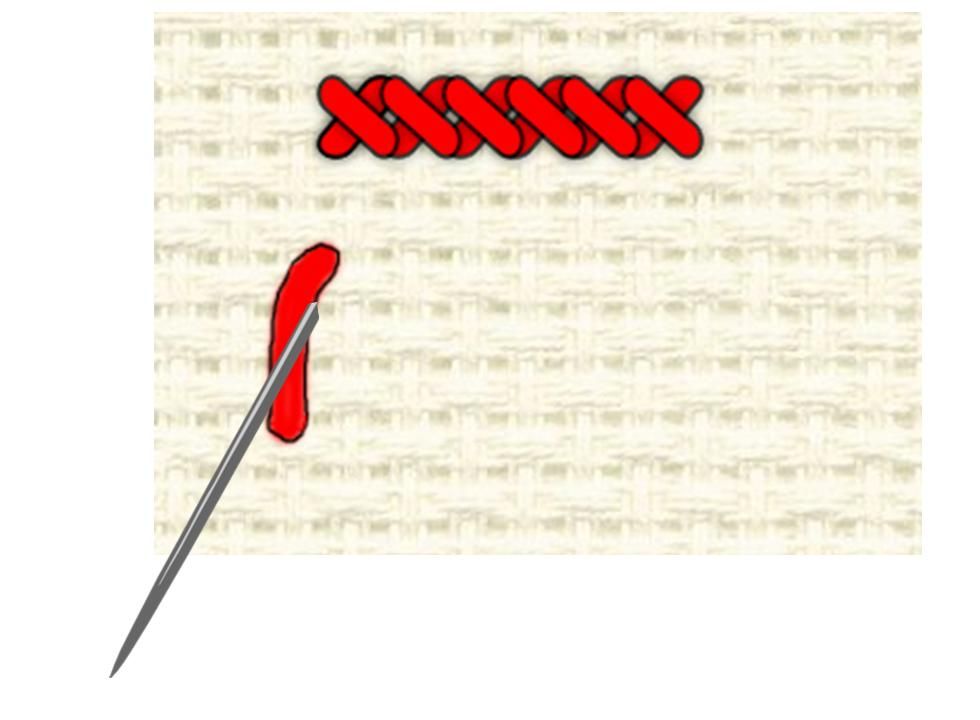
It's now to time to return to the first colour we stitched, the red. The thread you parked earlier was for that first stitch in row three, so like before, complete the stitch and any others in the row. If it's the last use of that colour for the chart, anchor the floss and snip, or if there's more to be had from this colour, park it and repeat the process!
Naturally this demo chart we've shown you is very basic. For more complicated arrangements, you would park your stitch much further down, essentially skipping along down the chart. Of course, your ability to park a multitude of colours depends on how many needles so have, so pick which colours you're going to park in way that you'll find easy, such as just background colours.
If there's any aspect of cross stitching you'd like us to cover like this for a later blog post, why not suggest it to us in the comments below? You can also ping it over to us on our Facebook page, through Twitter or via Google+.