So you've got your brand new Diamond Dotz kit, but where do you start? Past Impressions give you our step-by-step guide to completing your sparkling new kit, from straightforward instructions to everyday care tips!
#1. Start by laying all your components out on your work surface and unroll the fabric canvas. While the canvas still has the plastic cover attached, roll it the opposite way so that it doesn't curl up as much. You can then use masking tape to fix your project in place so it doesn't move about while you're working.
#2. Before you do anything else, make sure you wash your hands so that no residue ends up on the adhesive surface and keep your design away from dusty or messy areas. You can then peel back the plastic cover from the part of the design you're planning to start on.
Diamond Dotz Tip! Make sure you reapply the plastic film whenever you're not working or away from your design so that dust or debris affects the adhesive surface. The plastic film is designed to keep the canvas sticky.
#3. First off, refer to the symbol on the fabric canvas - which will be a circle, letter 'T' an 'X' or similar - find the corresponding symbol on the key that links to the packet e.g. A06 and choose the colour you're planning to work on.
#4. Transfer the dots onto the tray included in your kit provided. Only pour a few on at a time - it will make it easier to work with and won't cause too much mess if any accidents happen!
#5. Next up, open the wax caddy tray and, using the special stylus provided, attach the hand grip and press the stylus head 4 or 5 times in the wax so that the stylus is well coated. This action doesn't need to be repeated regularly so close the wax caddy once you're finished.
#6. Using one of the 'dots' that you've placed in the tray, pick it up using the stylus head. Ensure that when you pick up a dot that is the right way up with the rounded end facing upwards.
#7. Once you've done the previous 6 steps, you're well on your way to starting your shimmering diamond project! Following the symbol and colour key provided, place the dot accurately onto the top of that symbol space so that the flat side sticks directly to the adhesive surface.
#8. Continue applying the dots, starting from the bottom of the design and working your way up to the top so you don't risk losing revealing too much of the sticky design.
Diamond Dotz Tip! You may find it easier to complete your design one colour at a time, or make use of many coloured tiles in one go, all you need to do is find the style that works for you.
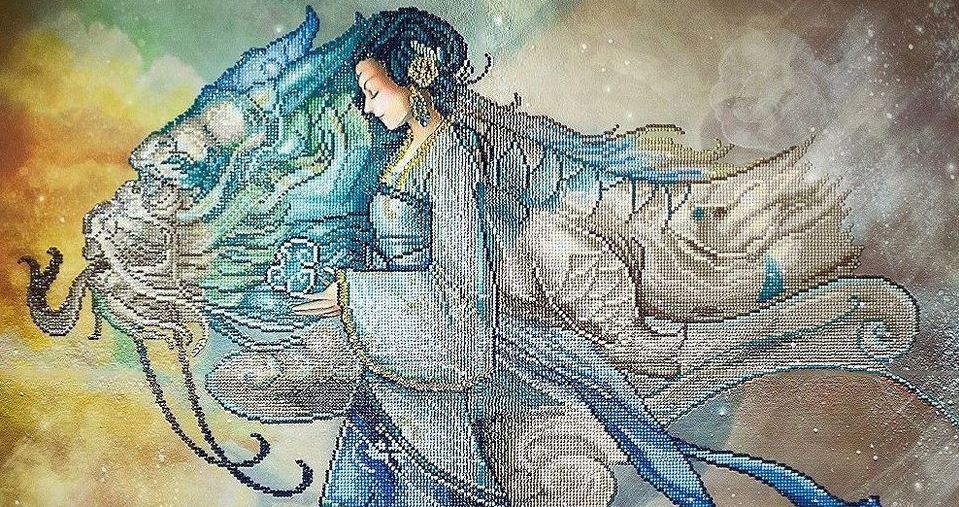
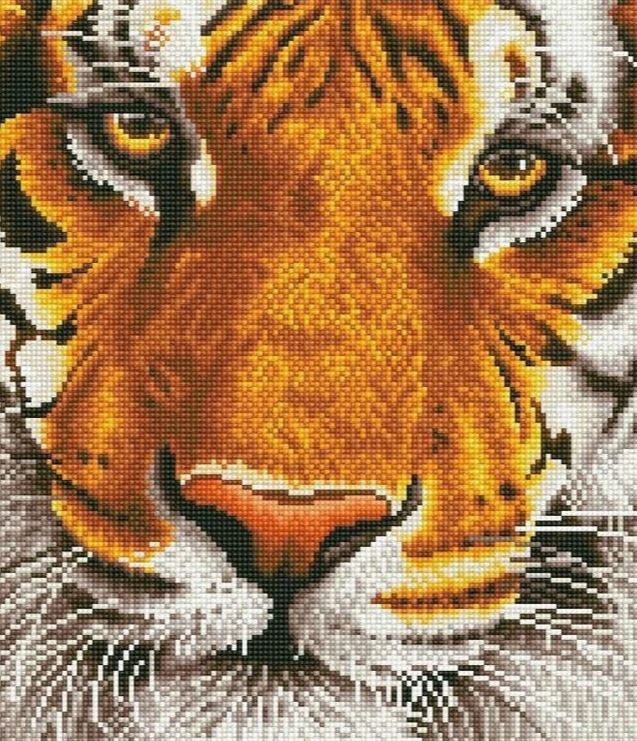
#9. When you've finished you'll have something mesmerising like this Bengal Magic design that you can display, frame or give to someone special as a gift! Take a look at our complete range of Diamond Dotz kits here to find exactly what you're looking for.
#10. And finally, whenever your kit is not being used, make sure the wax is always covered, the plastic film remains on the adhesive canvas and your stylus is wrapped so it won't dry up!